Create a Flask Application in a Few Minutes
Join the DZone community and get the full member experience.
Join For FreeAccording to The Pallets Projects, Flask is a lightweight WSGI web application framework. It is designed to make getting started quick and easy. This article will even make it easier by showing a step-by-step guide to creating a Python Flask web application with auto-generated desired data to get the application started.
Prerequisites:
To start, let's create a simple "hello world" application. First, create a new project. From the terminal or command line create a new directory:
mkdir myproject
cd myproject
Inside the project directory, create a virtual environment for the project. You can check virtualenv for more information. First, install virtualenv, create one, activate it, and install Flask:
pip install virtualenv
#Create virtualenv
python3 -m venv venv
#Create virtualenv for windows
py -3 -m venv venv
#Activate virualenv:
. venv/bin/activate
#Activate virualenv for windows
venv\Scripts\activate
#Install Flask on the enviroment
pip install flask
The project setup is now ready to start adding functionalities. To start, let's create a new file in the same directory with the following content and name it main.py.
from flask import Flask

app = Flask(__name__)

@app.route('/')
def hello():
    return "Hello World!"
We can now run the application by telling the terminal which application to run by using the following commands:
#Tell the terminal what application to run
export FLASK_APP=main.py
#Tell the terminal what application to run for windows
set FLASK_APP=main.py
#Run the application
flask run
The result should be like the following, telling you that the application is running on http://127.0.0.1:5000/. Navigating to this page should return "Hello World."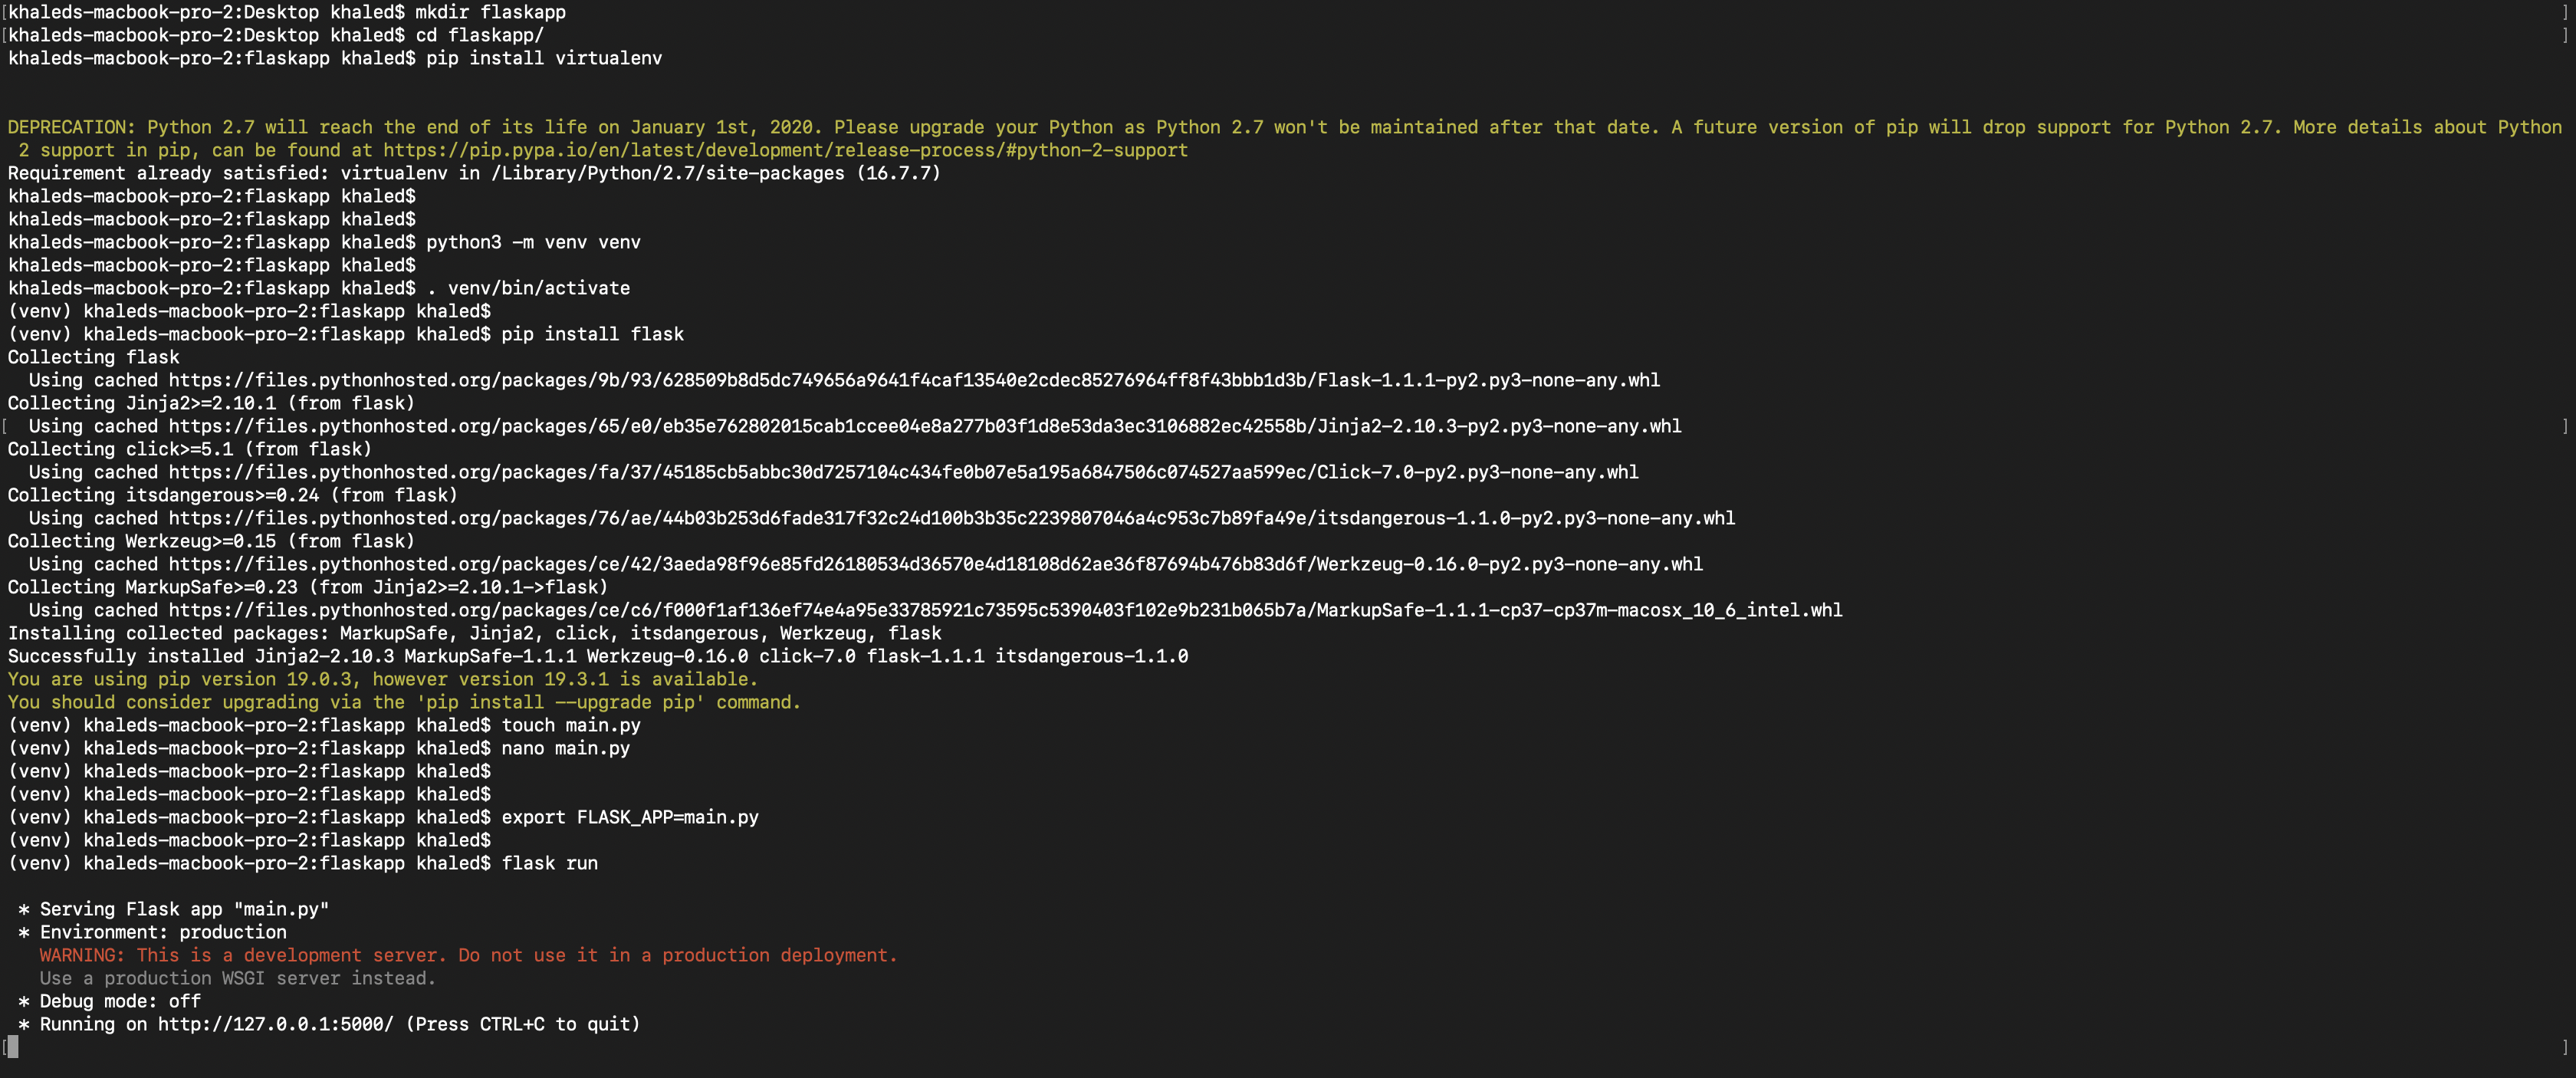
After completing the first part of the article, let's move to the next part and add functionality to our project. To start, we will download SQLALCHEMY to our project, which is an open source SQL toolkit and object-relational mapper for Python. We will download some other packages for Flask, such as wtforms and flask-wtforms to build our forms.
#To install Flask-SQLAlchemy
pip install pip install flask-sqlalchemy
#To install WTForms
pip install WTForms
#To install Flask-wtforms
pip install Flask-WTF
It's recommended to add the installed packages to a requirements format file. To do so, run the following command:
pip freeze requirements.txt
This command will generate a file called requirements.txt. It's used to store the packages, you can use the following command to install the packages from the requirements file. (this step may be skipped if you are running the code on the same machine used for the previous steps.)
pip install -r requirements.txtAfter having the project ready for the new functionalities, let's add some magic to it. To start, let me quickly introduce the Clowiz CodeGen feature from The Cloud Wizard.
The following image represents the CodeGen feature and all its components:

To start adding magic to the project:
Go to https://www.clowiz.com/code-generator/ to start using the CodeGen feature.
From the technologies section press on the Python Flask logo.
In the metadata section, fill in the Form Name (e.g. Employee). (It can be anything you like.)
In the Field Name section, change the first value to e.g. Name.
The second one can be renamed to Email. (Change the Data Type to Email.)
The third one can be changed to Salary and the Data Type can be changed to Double.
Copy the code from the generated code section into our main.py file below the
hello()method.
Now, let's define the database model, back to Clowiz AppGen, choose SQLAlchemy Model from the Generators section and copy the generated code and paste it in the main.py file under the form that we created.
After saving the main.py file, go to the terminal and execute the following commands to create the database:
python3
from main import db
db.create_all()
The next step is to create the routes for the application back to Clowiz AppGen. Then, choose from the generators view, copy the generated code, paste it below the database model in the main.py file, and save it.
Your main.py file should look like the following:
from flask import Flask, escape, request

app = Flask(__name__)

app.config['SECRET_KEY'] = 'any secret key'

@app.route('/')
def hello():
    return "Hello World!"


from flask_wtf import FlaskForm
from wtforms import SubmitField, HiddenField, StringField, IntegerField, DecimalField
from wtforms.validators import Email

class EmployeeForm(FlaskForm):
    id = HiddenField()
    name = StringField('Name')
    email = StringField('Email', validators=[Email()])
    salary = DecimalField('Salary')
    submit = SubmitField("Save")


from flask_sqlalchemy import SQLAlchemy
app.config["SQLALCHEMY_DATABASE_URI"] = "sqlite:////tmp/employee.db"
db = SQLAlchemy(app)

class Employee(db.Model):
    id = db.Column(db.Integer, primary_key=True)
    name = db.Column(db.String)
    email = db.Column(db.String)
    salary = db.Column(db.Numeric)
    references = db.Column(db.String)

    def __repr__(self):
        return "(%r, %r, %r)" %(self.name,self.email,self.salary)


from flask import render_template, request, flash, redirect, url_for

@app.route("/employee", methods=["GET", "POST"])
def createEmployee():
    form = EmployeeForm(request.form)
    employees = Employee.query.all()
    if form.validate_on_submit():
        employee = Employee(name=form.name.data, email=form.email.data, salary=form.salary.data)
        db.session.add(employee)
        db.session.commit()
        db.session.refresh(employee)
        db.session.commit()
        flash("Added Employee Successfully")
        return redirect(url_for("createEmployee"))
    return render_template("employee.html", title="Employee", form=form, employees=employees)

@app.route("/updateEmployee/<int:employee_id>", methods=["GET", "POST"])
def updateEmployee(employee_id):
    employee = Employee.query.get(employee_id)
    form = EmployeeForm(request.form, obj=employee)
    if form.validate_on_submit():
        form.populate_obj(employee)
        db.session.commit()
        flash("Updated Employee Successfully")
        return redirect(url_for("createEmployee"))
    return render_template("employee.html", title="Employee", form=form, employees=Employee.query.all())

@app.route("/deleteEmployee/<int:employee_id>", methods=["GET", "POST"])
def deleteEmployee(employee_id):
    employee = Employee.query.get(employee_id)
    db.session.delete(employee)
    db.session.commit()
    return redirect(url_for("createEmployee"))
Since we have a created a view, we should present the form to the user. Let's see how to generate the user interface.
Create a new directory in the project directory called templates by using the following commands(this folder must be called templates):
In the folder, create two files, one called
layout.html(note, this must be called layout.html because it will be imported in the employee.html file), and one called employee.html.
mkdir templates
touch templates/layout.html
touch templates/employee.html
3. Go back to Clowiz AppGen, choose Layout from the Generators section, copy the generated code, and paste it in the layout.html file.
4. Change the Generators section to Template and copy the generated code to the employee.html file.
5. Save the files and run flask run in the terminal. Then, navigate to .
You should see the following and be able to add a new record.

Now fill in the form and save the values you will get the following:

You can even update the record by pressing on the update button, changing the value you wish to update, and saving it.

To delete a record, press on the delete button.
You can get all the above steps with a better project structure and production-ready docker build ready for you by clicking the Download As Full Project button at the bottom of the CodeGen page.
Summary
In this tutorial, we have created a simple "Hello, world" app using Python Flask. Then, we used Clowiz AppGenerator to generate the required code for a complete project.
Further Reading
Opinions expressed by DZone contributors are their own.
Comments